Thursday, December 10, 2009

Think Of It!

Yes, think of it! When I am gone this is what goes on!


I about tinkled my pants when I saw this one. Does any other Mom out there get stressed looking at this? Man, was I glad I was not there to clean this up. Don't get me wrong, I am so happy the kids had a blast and made memories.....I'm just glad I wasn"t there....I would have had a COW!! When I got home there was not a nugget in sight. Only these pictures to show for it!

Sunday, December 6, 2009

Chalkboard Playhouse

When we finished our basement years ago we finished off the "under the stairs" area for the kids. My husband made a little door and a window trying to make it look somewhat like a house. At some point I wanted do something with the area. I was thinking a wall mural of some kind. Maybe a grocery store or a library would be cute. However, I am not an artist and I am too cheap to higher a real artist. So, I got out my chalkboard paint and painters tape and taped away.


It took three good coats of paint and it was finished. Isn't it cute?


Looking at the pictures, I am not sure why we decided to put an electric outlet right below the little window. What were we thinking? I should have painted it with chalkboard paint.

I am linking to


DIY Day @ ASPTL

Thursday, November 12, 2009

Hutch Makeover: a post revisited


I have a huge empty wall in my family room that needed a substantial piece of furniture. It was a huge wall of waynes coating and looked like a sea of white. I have this painting in my eating area that I thought I could incorporate the green color on the hutch.


I just love green and knew it was just the right color for the hutch. I also saw a beautiful hutch at Urban Farmhouse that I have been drooling over for months but just couldn't afford the price tag. Enter Craiglist:


I found this hutch for $100 on craiglist!! I was just so excited to finally find the piece I had been looking for. However, I was overly optimistic about this piece. It is ginormous!! I did not realize all the work it would take to remove all eight doors, 20 hinges, 14 knobs, not to mention all the taping it took for covering the glass before spraying.
When we finally finished I had do a bit of rearranging. I was going to put it behind my slipper chairs. I liked the hutch there but the chairs had to be moved to our library/ music room. The room that houses my Ikea cabinet.


Here she is all fancied up!


Please pay no attention to the hinges that don't match up. Like I said it was a huge task. I was so excited to start that I didn't think to make a note of which hinges went to which door. I am not a photographer by any means. I wish I could get a good picture of the actual color of the hutch. All the pictures I take make it look pastel and dull. Trust me, though....it is bright and just the punch of color the room needed.

Remember this picture?

The hutch is now where the black dresser and round mirror used to be.


>
I moved the black dresser across the room under my favorite old window.


It's amazing what a little paint and some rearranging can do for a room.


I also made a couple faux grain sack pillows for the room using drop cloths and a bit of left over paint from the hutch.


I am linking to:
Make it Yours @ My Backyard Eden

Wednesday, November 11, 2009

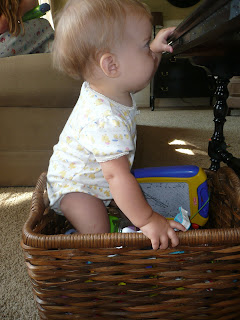
Reaching New Heights

The routine and schedule of our day has been a bit off lately. A 14 month old can do that to your day.


If my 6 year old has difficulties reading and spelling when she is an adult it is because our home school day during first grade was a bit interrupted by this adorable curious, fearless, climbing baby.

Saturday, November 7, 2009

Paint Color and other news

I am completely tickled that I was featured on ASPTL DIY day!!!!! How did that happen? Had I known so many of you would have been stopping by I would have had my picture in my sidebar changed....I really hate that picture....it doesn't even look like me....why did I chose that particular picture...why????...sorry....anyhow.
Thank you for leaving such sweet comments on my hutch makeover. Blogging is a great creative outlet for me and to have so many kind gals leave such sweet comments just makes my week! Thank you Thank you!!!!

OK, so the paint color is Behr paint from Home Depot. It is interior semi-gloss latex enamel and the color is called Grape Vine


We used less than a quart of paint on the entire cabinet!! Can you believe that? My husband used a sprayer to paint the entire thing. For the first coat we used the little sample can of paint that we bought at Home Depot. Less than $18 in paint for the entire project!!

This is our next piece we are going to tackle. I have been wanting to do something with our master bedroom for some time. Why is it, that the master bedroom is always the last room you do anything to? It will be awhile for this one, but I couldn't wait to share.


This is the fabric I am using.


I think I want to paint the dresser the shade of grey blue that is in the fabric. Layla at the Lettered Cottage used a perfect blue color that I think is just the right one I am going to go with.

Oh, and I found these wall mounted lamps at Pottery Outlet...$40 for the pair!! Score!!

Friday, November 6, 2009

I love Amy Butler

Lately I have been wanting to make matching outfits for my girls. They are pretty far apart in age which makes it difficult to find matching outfits at the store. I am a fabric addict. If I find some on sale I usually buy it hoping to find a project down the road where I could use it.

My sister gave me a gift certificate to fabric.com awhile back and I was able to load up on some Amy Butler fabric. I used some of it to make my curtain for my laundry room, quilts, and now I finally used some of it for the girls.
I used iron on transfer to attach the fabric to the shirts.


I cut out a smaller flower for the dress and used a bigger one for the 6x shirt.


They can finally match!


I just need to make a matching skirt.

I made this little shirt for my one year olds birthday party. I am not very good at sewing circles or anything other than straight lines for that matter. So, I decided to use special fabric paint around the raw edges. I think it looks cute and I have washed them a lot and the paint is staying on just great. Gotta love a fast, easy, and cute project!!


Tuesday, November 3, 2009

Craigs list Hutch: The After


I have a huge empty wall in my family room that needed a substantial piece of furniture. It was a huge wall of waynes coating and looked like a sea of white. I have this painting in my eating area that I thought I could incorporate the green color on the hutch.


I just love green and knew it was just the right color for the hutch. I also saw a beautiful hutch at Urban Farmhouse that I have been drooling over for months but just couldn't afford the price tag. Enter Craiglist:


I found this hutch for $100 on craiglist!! I was just so excited to finally find the piece I had been looking for. However, I was overly optimistic about this piece. It is ginormous!! I did not realize all the work it would take to remove all eight doors, 20 hinges, 14 knobs, not to mention all the taping it took for covering the glass before spraying.
When we finally finished I had do a bit of rearranging. I was going to put it behind my slipper chairs. I liked the hutch there but the chairs had to be moved to our library/ music room. The room that houses my Ikea cabinet.


Here she is all fancied up!


Please pay no attention to the hinges that don't match up. Like I said it was a huge task. I was so excited to start that I didn't think to make a note of which hinges went to which door. I am not a photographer by any means. I wish I could get a good picture of the actual color of the hutch. All the pictures I take make it look pastel and dull. Trust me, though....it is bright and just the punch of color the room needed.

Remember this picture?

The hutch is now where the black dresser and round mirror used to be.


>
I moved the black dresser across the room under my favorite old window.


It's amazing what a little paint and some rearranging can do for a room.


I also made a couple faux grain sack pillows for the room using drop cloths and a bit of left over paint from the hutch.


DIY Day @ ASPTL


Furniture Feature Fridays